WordPress can create problems like sluggish performance if the memory assigned to it is not enough for the execution of different processes running in the background. Another common issue is ERROR 500 in Customizer settings or at the backend.
Verify the Memory Assigned to Your Website
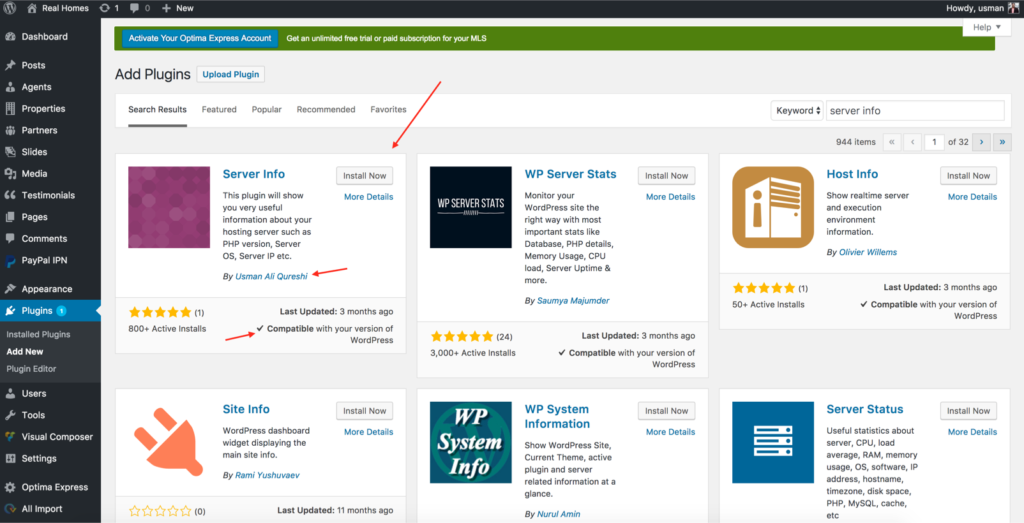
First, you have to check how much memory is already assigned to your website. You can do this by installing a plugin called Server Info. To install it navigate to WordPress Dashboard Plugins > Add New and search for “server info” and you will see it in the results.
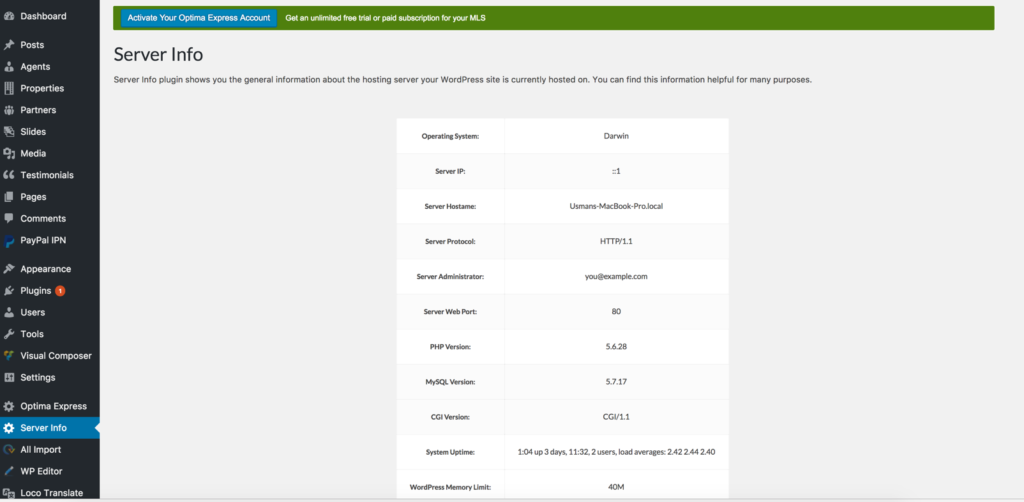
So, click on the Install Now button and then once installed click Activate. After the plugin is successfully activated you can then see the memory assigned to your website by navigating to WordPress Dashboard → Server Info.
You can see that by default only 40 MB memory is assigned and you have to increase it in order to resolve the issue you are experiencing.
Increase WP Memory Limit using WP File Manager Plugin
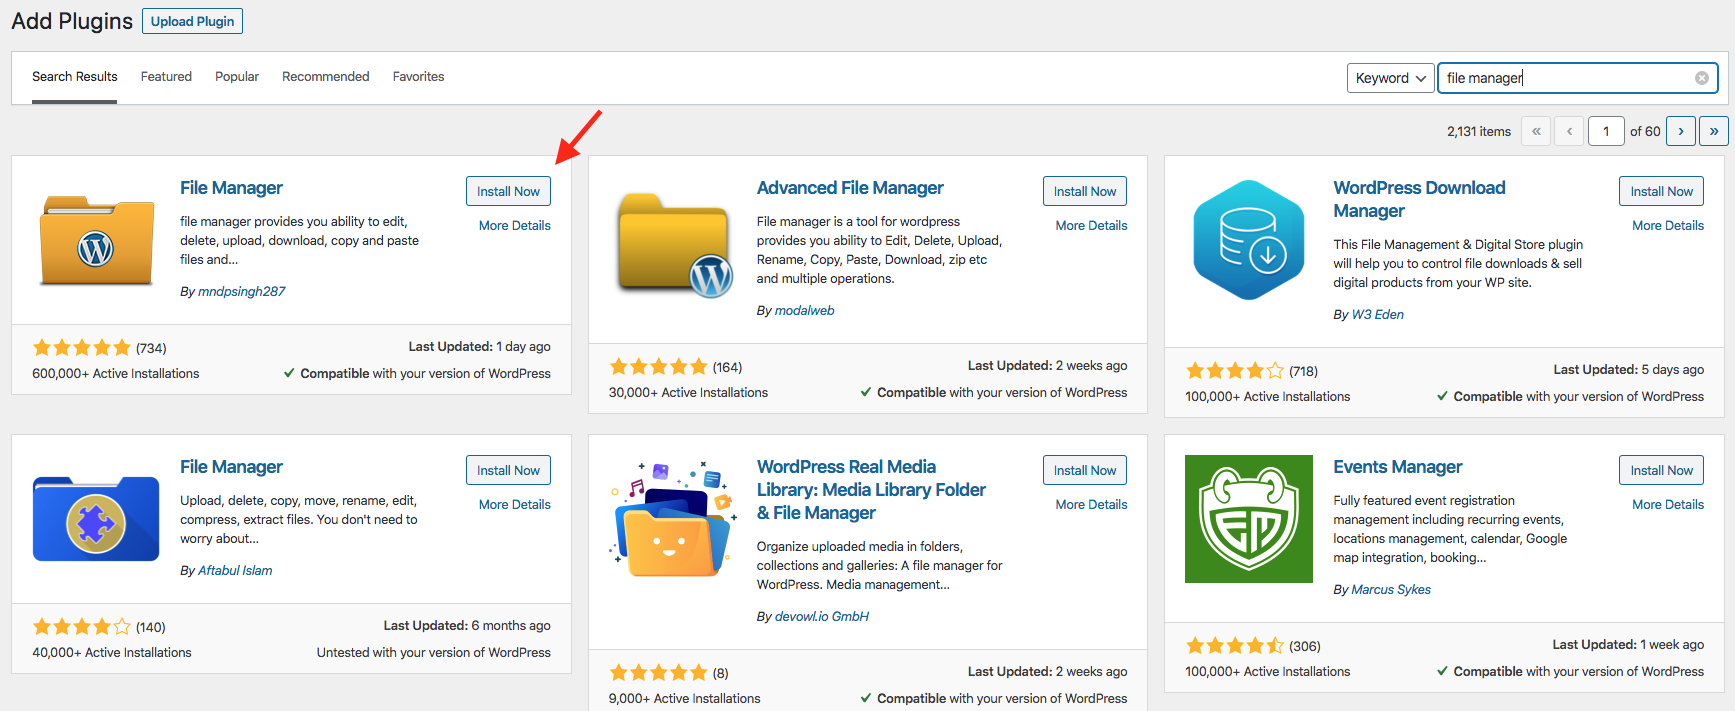
Navigate to WordPress Dashboard → Plugins → Add New and search for file manager and install and activate the plugin.
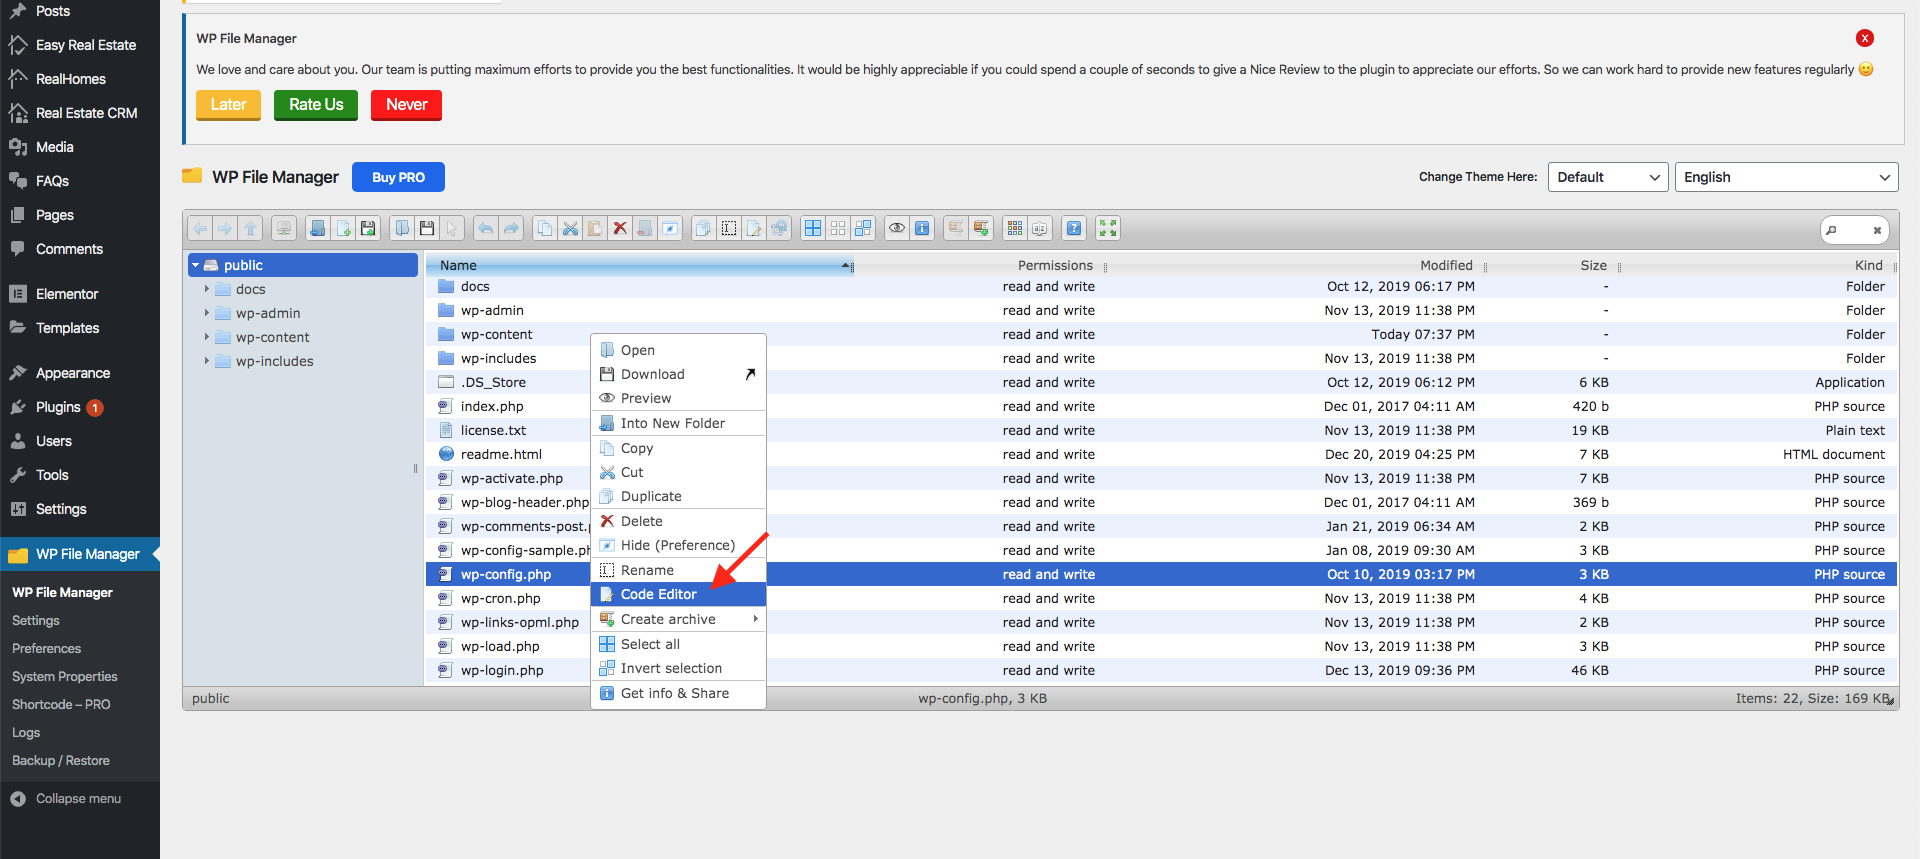
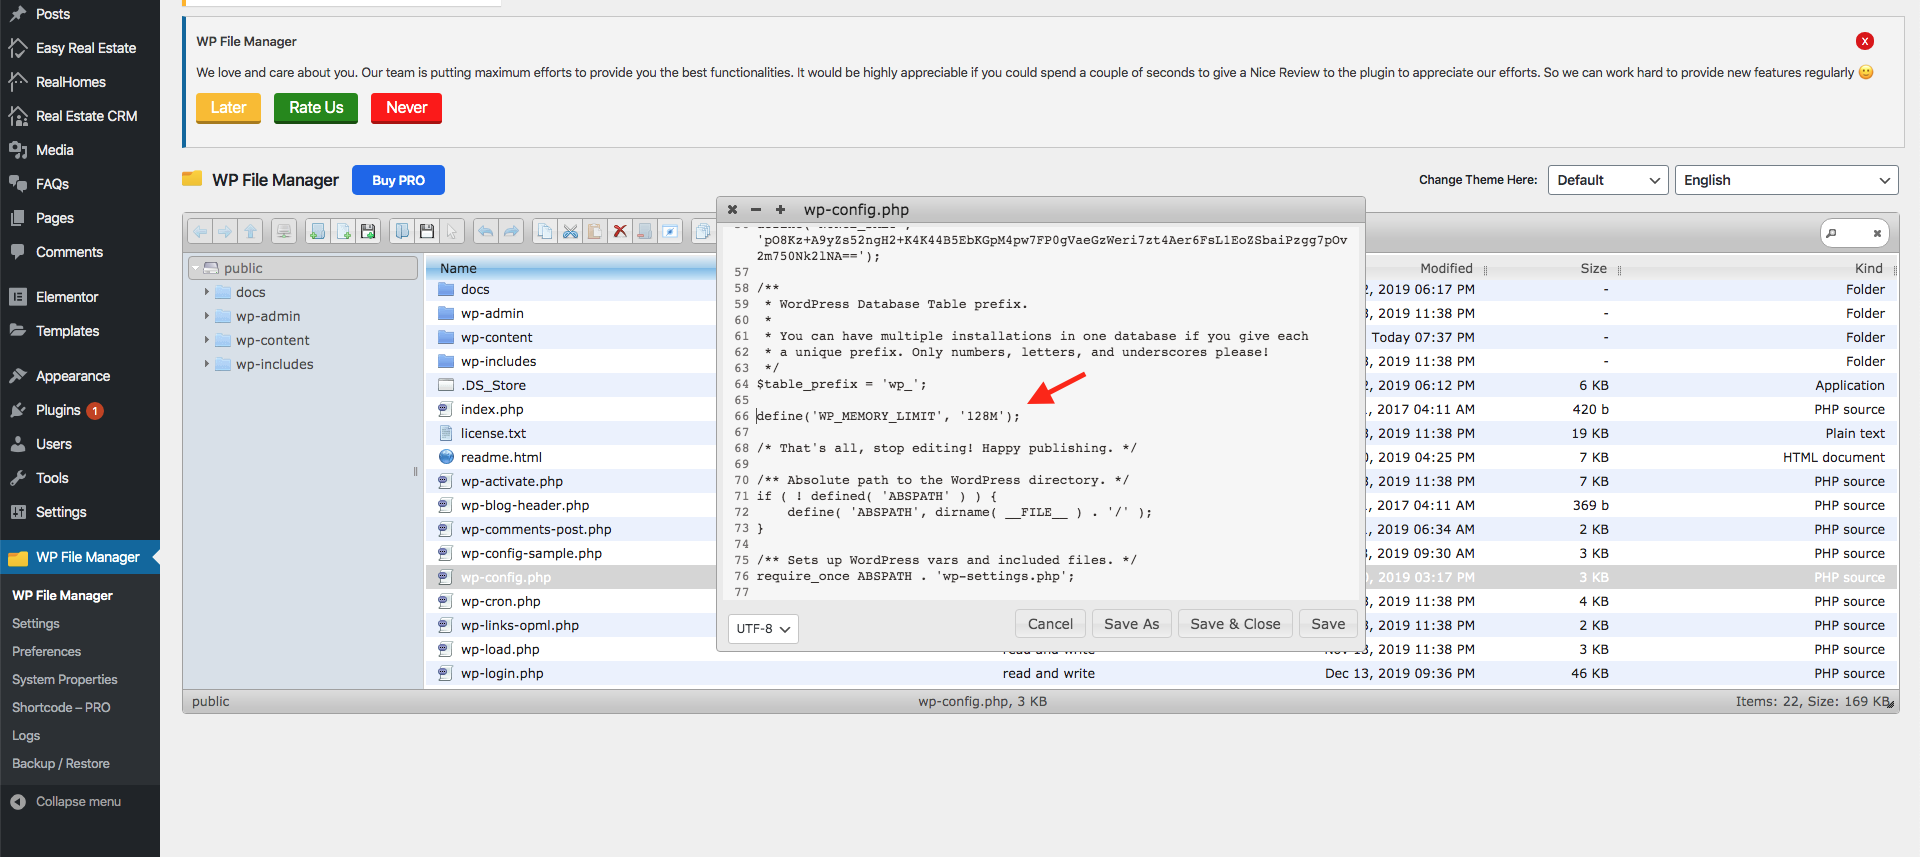
After installing the plugin navigate to WordPress Dashboard → WP File Manager. On this page, you will see all the files including .htaccess and wp-config.php. We are going to increase the memory so we have to add our code in wp-config.php file. Simply right-click on the wp-config.php file and then click on Code Editor as shown below.
The code you have to add right after the debug code is as follows.
define('WP_MEMORY_LIMIT', '256M');
define( 'WP_MAX_MEMORY_LIMIT', '256M');
Click on Save & Close to save these changes. You can again verify if the memory is increased or not by navigating to the WordPress Dashboard → Server Info page and this time you should see the memory as 128M.
If you still need further assistance or have a question then please feel free to open a ticket on our support site (login required):
https://support.inspirythemes.com/ask-question/
