MedicalPress Theme is premium WordPress theme and with every new update release, our development team fix bugs, add new features, improve performance and enhance existing features.
So, It is important to keep it updated to have latest features and avoid problems. In this article, I will explain how you can safely update MedicalPress Theme to its latest version.
You can click on a step to fast forward to it.
- Backup Your Website
- Download Full Package of MedicalPress Theme
- Activate Maintenance Mode
- Prepare For Update
- Update Real Homes Theme
- Switching Designs Properly
- Make Sure Everything is Working
Backup Your Website
The first and the most important step of the update process is to backup your entire website just in case if anything goes wrong. For backup, If you not already have a system in place then my recommendation is UpdraftPlus WordPress Backup Plugin.
What I like in UpdraftPlus plugin is it provides the ability to back up everything to Dropbox, Onedrive, Google Drive etc. You can read more about it on its official WordPress plugin page. So, go ahead install and activate the UpdraftPlus plugin. You can find a more detailed guide to configure UpdraftPlus by reading this article.
Download Full Package of MedicalPress Theme
In order to make sure you have the most recent/latest and secure (virus/malware free) version of MedicalPress Theme, follow the steps below.
- Login to themeforest.net with your account and go to the downloads page.
- Once you are on the downloads page look for MedicalPress theme and the Download button in front of it.
- Now when you will click on the download button you will see a drop down with multiple options. In this drop-down list click on All files and documentation and you will download the full package of MedicalPress theme including the premium plugins which come with it (screenshot below).

- Now you have the full package of the latest version of MedicalPress Theme, extract it and continue with the rest of the update process below.
Activate Maintenance Mode
It is not a good idea to leave the website as is while it is under an update process so you should display a nice message and activate the maintenance mode and in this case, our recommendation is Maintenance Mode Plugin.
You can simply install and activate it. Once activated, you can navigate to Dashboard → Settings → Maintenance Mode and customize the maintenance message and Enable the Maintenance Mode.
Prepare For Update
Before updating MedicalPressTheme, there are few things to take care first. So, make sure to go through the following points.
- Disable Caching Plugins: First of all, if you have any caching plugin activated then purge all the caches using the plugin’s options and deactivate this plugin.
- Update All Out-dated Plugins: Many of us use translation and other plugins, so if you have any translation and other plugins make sure to update them to their latest version.
- Update WordPress: WordPress must also be updated to its latest version.
- Secure Important Customizations: One of the most important things to check is if you have made any customizations then those should be in the child theme which is the best practice. So, if you have made any code level changes then move/copy them to the child theme (if you are not running your website using the child theme then install and activate the child theme and then copy/move the modified files to it). A basic MedicalPress child theme is included in the package you have downloaded from themeforest.
- Critical Step Before Update: If you are using MedicalPress Theme version 1.6.1 or earlier with some code level customizations then you must compare your modified code with the latest codebase of MedicalPress Theme because in version 2.0.0 there are major files and folders structure changes and code changes are implemented with an entirely new design called “Reborn“. So, To keep your old changes you have to adopt new files structure in child theme after updating parent theme.
Update MedicalPress Theme
At this point, I presume that you have followed all of the above steps to be on the safe side before updating the theme. So, simply follow any of the following guides to update the theme.
Update Theme Using Envato WordPress Toolkit: CLICK HERE TO OPEN THIS KNOWLEDGEBASE ARTICLE
Better Way to Update WordPress Theme: CLICK HERE TO OPEN THIS KNOWLEDGEBASE ARTICLE
After completing the update process activate all the plugins (caching or other).
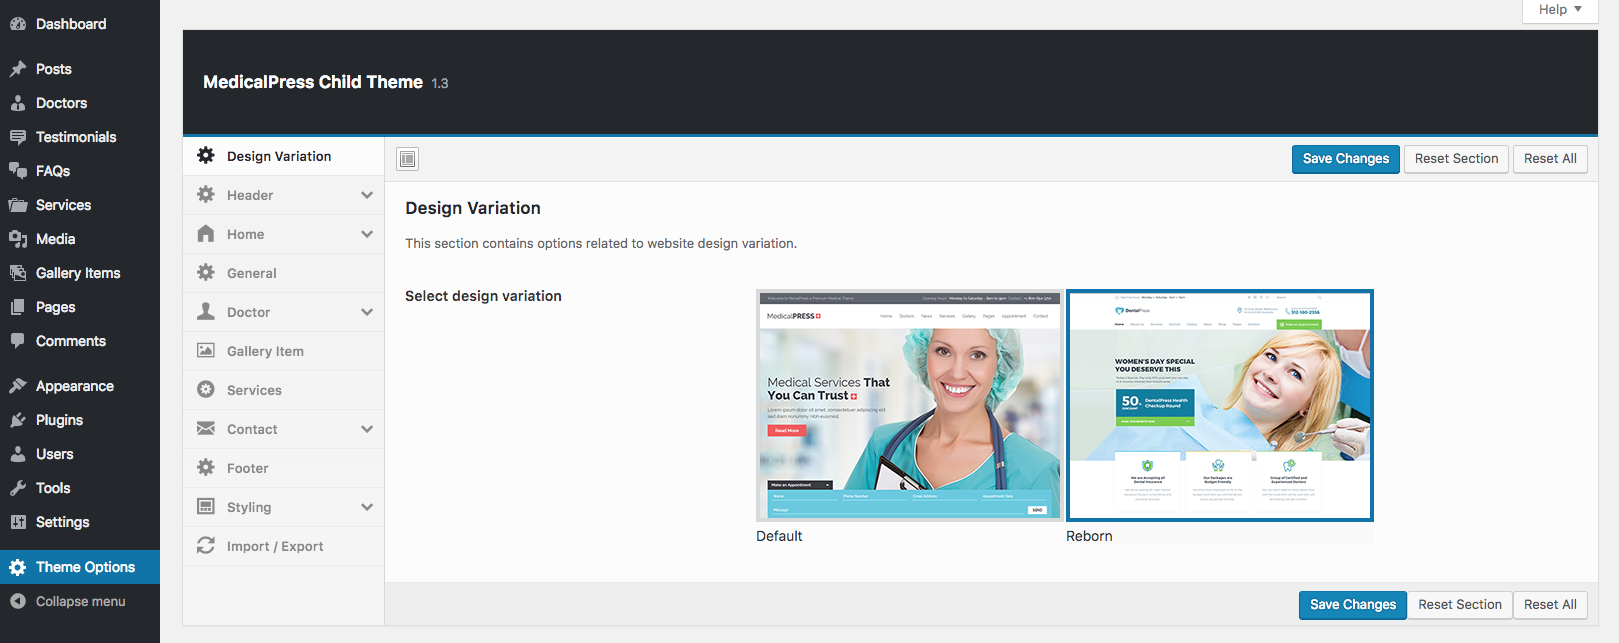
Switching Design Properly
If you are updating the theme from version 1.6.1 or earlier then you might want to switch to the new Reborn design for a fresh look so you can follow the following steps.
- Navigate to Dashboard → Theme Options → Design Variation and select the design of your choice and save the settings.

- After saving the settings the next step is to regenerate all the images according to the new design chosen in the first step. So, install and activate Regenerate Thumbnails plugin. After activation, navigate to Dashboard → Tools → Regenerate Thumbnails and regenerate all thumbnails.
- Once it is done, then make sure all to check all the page related options.
Make Sure Everything is Working
Once the theme is updated to its latest version, you must check every page of your website to make sure everything is running smooth. This doesn’t require any special steps, just go through each page of your website from the frontend.
Hopefully, you won’t experience any problem but if you do you can create a support ticket immediately to get the problem resolved.
– Usman